3DP Raspberry Pi and iBeacon voting machines for Confitura 2014
Jarek - 3DP and Overview
Confitura is one of the biggest Java conferences in Europe. This year we prepared something special for the audience - a voting machine that allowed expressing one’s opinion about a talk.
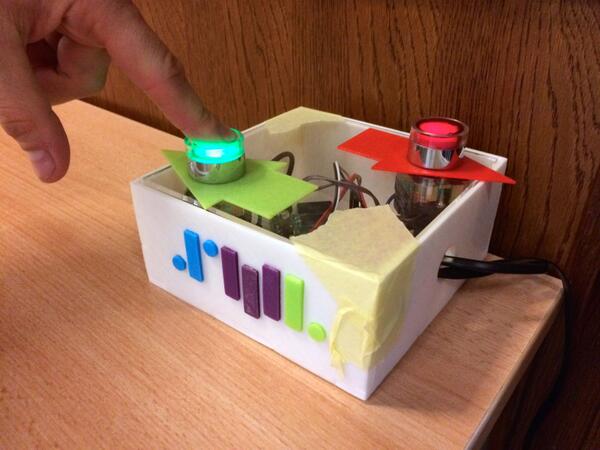
We also have given a talk about how we built it from scratch. That involved developing the application on a RaspberryPi and connecting two buttons, one for giving a “Like”, and another one for telling the speakers to improve their presentation skills. Last but not least, we had to design and model a box for all these elements and print it with a 3D printer. The result looks like this:
We also presented our conference applications (Android, iOS - more on them next week!), which based on signals emitted by iBeacons from different vendors let you know where exactly you were and what the distance to other rooms was.
Let’s start with the box. We printed it with a 3D printer from Pirx. It’s the cheapest thing you can get right now and we were satisfied with the quality. It doesn’t have a heated bed and uses PLA (thermoplastic polimer) which has some disadvantages compared to ABS. Still, we are happy with the results.
The box had to be modeled in one of the 3D designers, like Blender or Tinkercad. The first model was too big. It was one piece and never got printed completely. While printing, something went wrong every time. Then we decided to split it into a bottom part and 4 walls.
Once the model was done, we had to figure out the best parameters for the Slicer. A Slicer is an application that takes a model, slices it horizontally and provides instructions for the printer on how to move the extruder to print the model layer by layer.
Once all was printed a hammer did the rest – no glue, no tape, nothing. The walls and the bottom fit tightly together.
Jacek - Raspberry Pi and electricity
The hardware setup was fairly simple: we used two backlit buttons for "like" and "dislike" and a LED which indicated that the application is alive and also confirmed that a vote has been counted.
The buttons differed not only by their color, but also by their behavior when not pressed - one of them was a "normally open" (NO) and the other "normally closed" (NC). Since the votes were always counted when an input changed from low to high, we needed to connect each of the buttons in as slightly different way.
The NO button was connected to +3.3V and an input with a pull-down resistor (so the input was low when the button was not pressed and changed to high after pressing), while the NC button was connected to GND and an input with a pull-up resistor (which, similarly, made the input low for a not pressed button and high for a pressed one). Interestingly, we didn't need to use our own pull-up/down resistors, as RapsberryPi's GPIO has them built in - you can activate them while provisioning an input pin.
The tricky and important part of handling the buttons was a so-called debounce. Let's assume we have a button which, when pressed, changes a state of an input from low to high. Now it's crucial to note that, with a mechanical button, the transition from low to high is never instant - there's always an intermediate period when the state fluctuates randomly between low and high.
This takes some tenths of milliseconds and is caused by the fact that a mechanical switch always vibrates when pressed. So if we had counted every change from low to high, we would have detected much more button presses than there actually were. To overcome this behavior, we used one of the standard debouncing techniques - after a transition from low to high was detected, we waited a little bit to see if the state change is persistent and only then did we handle an actual button press. We used a delay of 200ms which is long enough to eliminate the side effects, but also short enough to enable two subsequent persons to successfully vote.
The heartbeat LED (i.e. the "application is alive" indicator) was driven by a separate thread, whose sole purpose was to blink the LED infinitely. Thanks to this flashing light, we could instantly know when the application has hung for some reason (which actually never happened) - no need to SSH into the system.
It's quite important to have a dynamic (here: blinking) heartbeat indicator, since if we had only used a constantly-on light, we would have never known if it was on due to the application being alive or due to the fact that it was hung with the output pin in a high state.
The RaspberryPi's were using a WiFi connection to access the vote counting server, but we also left a diagnostic "backdoor" - there was an Ethernet cable sticking out of every voting box, so in case of any emergency we were able to seamlessly connect to the box without relying on a not-always-reliable conference WiFi network. But the boxes turned out to be so rigid, that we never needed to use the diagnostic cable :)
We've open sourced the vote reporter and vote counter - feel free to use them!
Stay tuned for pt.2 - featuring the Android/iOS mobile apps and more about iBeacons!